
Microsoft Power Point is one of the most popular Presentation Programs supported by both Mac and P/c platforms. Microsoft PowerPoint can be used to create interactive Presenta- tions for Classroom, Business, or Personal etc.
Microsoft Power Point PDF download करें
What is MS Power Point?
Microsoft Power Point (PPT) is a powerful, easy-to-use presentation graphics soft- ware program that allows you to create professional-looking electronic slide shows.
The image given below shows the main page of MS PowerPoint, where a person lands when the program is opened on a computer system:
Uses of Power Point Presentation
Microsoft Power Point presentations are useful for both personal and professional usage. Given below are a few of the major fields where PPT is extremely useful:
- Education – With e-learning and smart classes being chosen as a common mode of education today, PowerPoint presentations can help in making education more in- teractive and attract students towards the modified version of studying
- Marketing – In the field of marketing, PowerPoint presentations can be extremely im- portant. Using graphs and charts, numbers can be shown more evidently and clearly which may be ignored by the viewer if being read
- Business – To invite investors or to show the increase or decrease in profits, MS Pow- erPoint can be used
- Creating Resumes – Digital resumes can be formed using MS PowerPoint. Different patterns, photograph, etc. can be added to the resume
- Depicting Growth – Since both graphics and text can be added in a presentation, de-picting the growth of a company, business, student’s marks, etc. is easier using PPT
Government exam aspirants can upgrade their preparation with the help of the links given below:
How to open MS Power Point on a personal computer?
Follow the steps below to open MS PowerPoint on a personal computer:
- Click on the start button
- Search PowerPoint
- Choose Icon ,& then left click / Press Enter Button.
♦♦♦ Run Command :- Press Win Key +R [powerpnt]🡺 Ok
A blank presentation is open on the screen. According to the requirement, a person can modify the template for a presentation and start using the program.

ये ज़रूर जाने>>> How to Rank in Google’s AI overviews? AIO
What is a Power Point presentation or PPT?
Microsoft Power Point A combination of various slides depicting a graphical and visual interpretation of data, to present information in a more creative and interactive manner is called a Power- Point presentation or PPT.
⇒ Ribbons
Microsoft Power Point uses several tabs to allow you to modify your document. If you want to see tab, go to View -🡺 Ribbon.
On the Ribbon under the Home Tab, contains a text editor and the new slide icon. The Home Tab contains icons such as Paste, Cut, Copy, Format and Layout.
⇒ Title Bar
This is the top section of the window. It shows the name of the file followed by the name of the program which in this case is Microsoft PowerPoint.
⇒ Slide Area
This is the area where the actual slide is created and edited. You can add, edit and delete text, images, shapes and multimedia in this section.
⇒ Help
The Help Icon can be used to get PowerPoint related help anytime you need. Clicking on the “?” opens the PowerPoint Help window where you have a list of common topics to browse from. You can also search for specific topics from the search bar at the top.
Menu Bar of power point
The Menu bar contains all the options available to you in Microsoft PowerPoint.
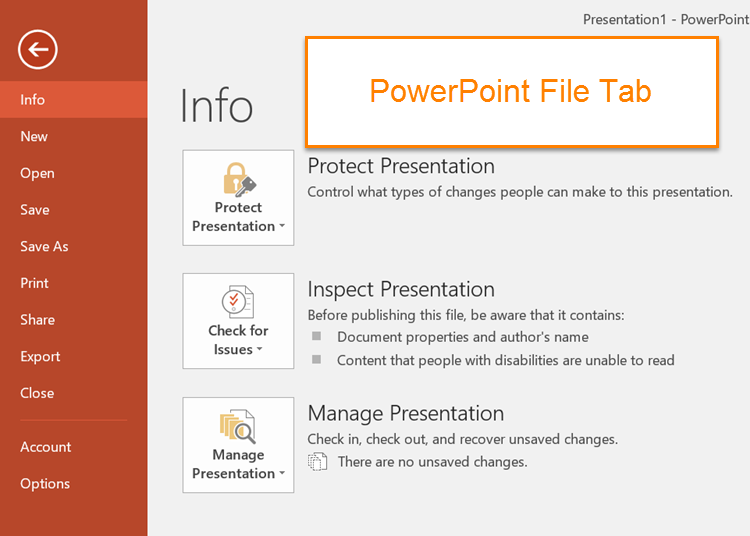
The File Tab in Microsoft Power Point 2016 is some of the most important tabs in PowerPoint. Some of the important actions are listed in File Tab like Sharing, Saving, Protecting, Save & Save As and more.
File Tab (Menu)
1 Info :-
You can manage File data setting, protect your presentation, give a password, restrict ac- cess to the presentation.
If you have many accounts, so it will provide information that when and which presentation was opened and edited. Also, show last time when you worked with PowerPoint.
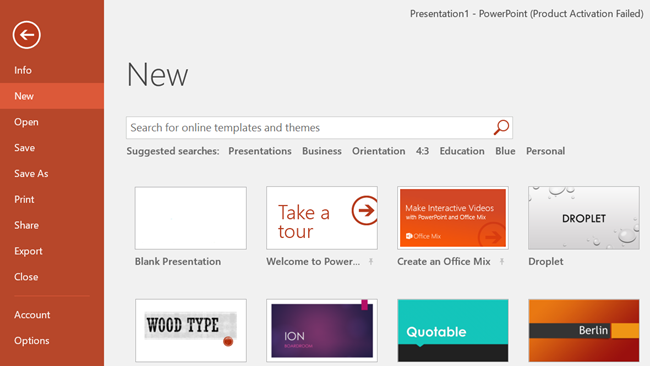
2 New
You can opennew templates that you want or a blank page. You can search for online templates if you have an internet connection. You also can use the filter templates that are below the search bar.
If the blank page is needed, go to insert tab and click on the (Blank Page).
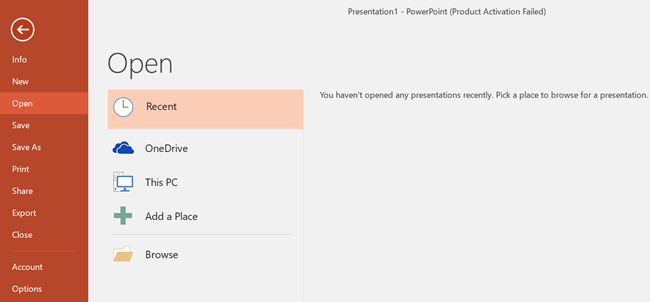
3 Open
In this option, there are many options that you can open presentation from there as well.
♦ Recent: The recent presentation that you have opened are listed on the right side, and you can click and open the presentation that you need.
♦One Drive: You can insert presentation from any device that has One Drive app.
♦This PC: If you have any presentation and that is not in the recent files, you can browse and open that presentation. You can browse through the (documents) folder on your PC.
♦Browse: It is the fourth way that you can open a file or a presentation. Simply just browse and find the presentation and click “Open” to open. If you’re interested in open- ing document in Word 2010/2013 visit
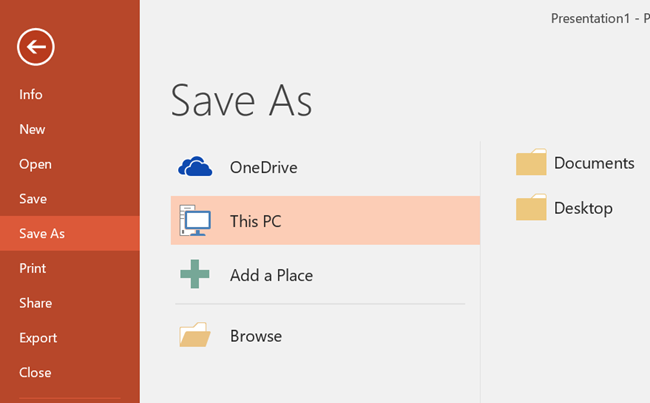
4 Save & Save as
Save and Save As are similar to each other, If you have saved the presentation before by any other name then the second time if you want to save you have to click on Save As.
If you have not saved the presentation before so you can click on the Save option. Save as mean you can save it as a PDF, XPS document, and many more types.
5 Print
You can print the presentation that you have made. It is very easy just select the correct op- tions.
First, select how many copies you
want to copy then select your printer.
After that select the page If it should be landscape or portrait, grayscale or colored and then click on the print button.
The Printing option in PowerPoint 2016 and 2013 are same.

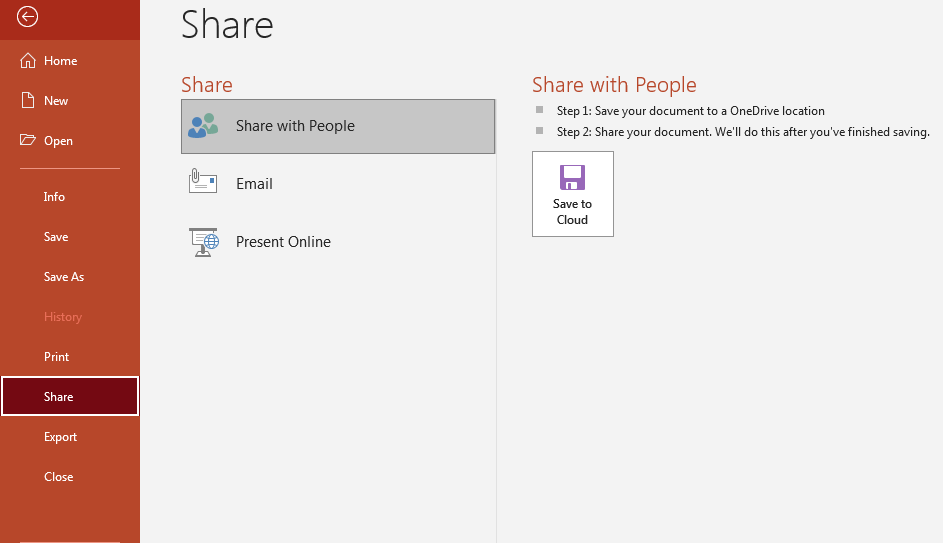
6 Share
The presentation can be shared with two computers If that are linked. You can share presentations via Email and publish the slide directly If you have a website.
You can present a presentation online on a website for that you need to have a Microsoft account.
7 Export
It is used to Export the data PDF , Video and other format

8 Close
Close the slides and all content from the presentation you have opened.

Home Tab
On the Ribbon under the Home Tab, contains a text editor and the new slide icon. The Home Tab contains icons such as Paste, Cut, Copy, Format and Layout.
⇒ New Slide:– To add an additional new slide to your Presentation go to the Home Tab 🡺 New Slide.
⇒ Slide Layout:- To apply a slide Layout, select the HomeTab🡺Layout.
From here, we can specify how the content on your slide is displayed. To apply a layout to your Slide click the layout button, and choose your preferred style.
Insert Tab
⇒ Pictures:- To insert a Picture into your Presentation select Insert 🡺Picture. Choose either to get the photo from a browser or from a file and then located the image that you want to put into your document and click Insert.
⇒ WordArt:-To insert a WordArt: – Go to Insert🡺WordArt. You will then be prompted to select the effect of your choosing, afterwards, you will be prompted to insert your text.
⇒ Creating a Table:- To create a table within your document, go to the Insert 🡺Ta- ble. Choose the desired table size by typing in the required number of rows and Col- umns and click ok. The Table will be inserted into document. To navigate within your table, use the Arrow Keys.
⇒ Flowcharts:- Flowcharts are used to Create diagrams in Microsoft PowerPoint.
To insert a Flowchart in PowerPoint:-Click Insert Tab🡺Smart Tab.
Design Tab
The default slide design for Microsoft Power Point documents is a blank Slide. Therefore, if you want your Slides to have a specify design, you must add one.
Transition Tab
Adding Transitions in between Slides:-
To add a Transition into your Presentation select the Transition Tab. You are then given a Variety to choose from “Fade”.
When you select a Transition it will show a Preview on the existing Slide. You must have text or an image within the slide to see a Preview.

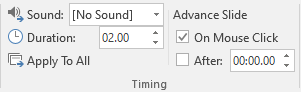
⇒ Duration:-Along the right hand side of the Transitions options you will see Duration. This allow us to modify the Duration of the Transition that is present on the Particular side.
This is also fea- tures an ability to Play a sound and to control whether or not to change to the slide by “On Mouse Click”.
Animation Tab
Adding Animations to Objects:- To add an Animation to an object, select the Animations tab. You are then given a variety of different options. “Blind”.
When you select it will show a Preview on existing slide.
You must have text or an image within the slide to see a Pre- view.

⇒ Exit Effect:-
To add an Exit Effect, Select the red star located to the left of the Animation options. Select the object or sound you would like to add the effect to for a Preview.
This feature allows for the object to exit off of the slide by a certain style of choice.
⇒ Slide Show:-
To access Slide shows, select the Slide show Tab. The purpose of the Slide show Tab is for the Presentation to have an easy access to the full screen Presentation mode as well as Rehearse Timings and record Slide show.
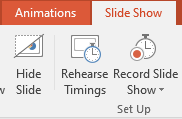
⇒ Rehearse Timings:-
Rehearse Timing can be a very useful tool that allows you to set up your Presentation to Play as a certain speed without having to click through the slides yourself.
Also, this allows you to practice your talking points. This feature allows you to save timing for each slide and transition, and will start the PowerPoint automatically.
⇒ Record Slide show:-
Record Slide show is very similar to the Rehearse \timing. The only Primary different is that you can have the option to start recording at any given Slide, rather than the beginning.
Review
⇒ Spell Check:-
Located in the Review Tab you will find ABC spelling to the far left. ABC Spelling will find the spelling errors that are within your Presentation. Make sure you are on your first Slide to get an accurate result.
View
The View Tab contains different tools to allow us to view your Presentation depending on the certain way that you choose.
⇒ Normal:-
Normal is your ordinary view that allows us to see and create your Presen- tation Slides.
⇒ Outline:-
This view allows for you to change the order of the Slides in which they appear. To do this clicks the desired Slide and drag. Once you start dragging a grey line will appear.
Drag the Slide up or down until you see the grey line to the right of the correct side where you would like to move it.
⇒ Slide Sorter:-
This feature allows us to see thumbnails of your Slides in a horizontal view. This view allows for you to make easy changes to several Slides at once.
⇒ Notes:-
The Notes Page allows for you to add notes to any Particular Slide you want. This comes in handy to where you are Visually able to see Slide notes while giving your Presentation.
⇒ Slide Master:-
The Slide master is where all of the information such as background, Color, and theme are stored.
Every PowerPoint has at least one Slide Master. In the slide Master, you are able to change any of these particular things.
Sample MS Power Point Questions and Answers
As discussed earlier in this article, Computer Awareness is included in the syllabus for many com- petitive exams. Thus, to understand the program from the examination point of view is also a must.
Given below are a few sample questions based on MS PowerPoint.
No fixed number25300
View
ctrl+M
Insert
Animation
